 How-to
How to Repair Small Tears in Down Jackets at Home
Last Updated: November 6, 2026
Quick Summary
To repair small tears in a down jacket, first measure the tear and check its location and fabric. Then clean the area, contain any loose down, and apply a rounded self-adhesive nylon patch that extends at least half an inch past every edge. Let it cure flat for 24 hours before wearing or washing.
- Measure the tear and note whether it sits on a seam, baffle, zipper, or open panel.
- Use a self-adhesive patch for flat tears up to about 2 inches on nylon shells.
- Round the patch corners so they lie flatter and resist peeling.
- Leave the patch to cure flat for 24 hours before you wear or wash the jacket.
- Choose stitching or professional repair for tears over 2 inches or on high-stress areas.
Table of Contents
- Assess the Tear Before You Start
- Choose the Right Method: Patch, Tape, Adhesive, or Stitching
- Gather Materials and Prepare the Damaged Area
- Contain Loose Down and Push It Back Inside
- Apply a Down Jacket Repair Patch Step by Step
- Repairing Tears Near Seams, Baffles, and High-Stress Areas
- Book Your Jacket Cleaning or Repair Pickup with LaundrPro
- Frequently Asked Questions
Assess the Tear Before You Start
A small tear in a down jacket is one of the most common repairs, and it is usually easy to fix at home, especially when you know how to repair small tears without making the damage worse. Before you touch any glue or tape, take a close look at the damage. Check the size, the location, and the fabric around it. Knowing how to repair small tears starts with this check, because the right repair depends on all three.
Start by checking how much down is coming out. If only a few feathers poke through, the hole is small and the repair is simple. If a steady stream of down is escaping, the tear is bigger, or the stitching around it has come loose.
Next, look at the location. A tear on the chest or back of a jacket faces less stress than one near a zipper, a pocket, or a seam. Tears near high-stress areas need a stronger, more careful fix.
Quick checks before you start:
- Size: Measure the longest side of the tear with a ruler.
- Location: Note whether it sits on a seam, baffle, zipper, or open panel.
- Fabric: Feel the shell. Thin, worn fabric may need a larger patch than the tear itself.
- Down loss: Count how much down is escaping, even roughly.
Watch out: a tear that looks small on the outside can hide a larger opening inside the baffle. Gently turn the jacket inside out and check the lining before you choose a method.
If the damage is large, or the jacket is expensive, a professional repair may be the safer call. A professional repair or cleaning service can advise on whether a home fix makes sense for your garment.
Choose the Right Method: Patch, Tape, Adhesive, or Stitching
Four methods work for most small down jacket tears, but the right choice depends on tear size, shell fabric, and where the damage sits. Use this decision guide instead of picking whatever is on the shelf.
Start with tear size. Measure the longest side of the opening with a ruler.
- Under 1 inch on a flat panel: repair tape or a small self-adhesive patch is usually enough.
- 1 to 2 inches on a flat panel: a self-adhesive nylon patch gives the best balance of speed and durability.
- Over 2 inches, or any tear on a seam, baffle, zipper, or cuff: stitching or professional repair is the safer call.
Then check the fabric. Most down jackets use a nylon or polyester ripstop shell. Self-adhesive patches bond best to clean, dry, flat-weave nylon. On stretchy or heavily textured fabric, tape may lift at the edges within a few wash cycles.
Check the care label before you commit. A patch or adhesive that cannot survive the jacket's recommended wash cycle is not a repair. If the label calls for machine washing, choose a patch rated for laundering and avoid fabric adhesives that soften in warm water.
| Method | Best For | Tear Size | Durability | Watch Out For |
|---|---|---|---|---|
| Self-adhesive patch | Clean, flat tears on nylon shells | Up to about 2 inches | Good, holds through gentle washing | Peels if the surrounding fabric is dirty or worn thin |
| Repair tape | Quick fixes on thin or stretchy fabric | Under 1 inch | Fair, may peel after repeated washes | Lifts at corners; not a long-term fix on high-stress areas |
| Fabric adhesive | Small holes and reinforcing edges | Under 1 inch | Good when cured fully | Can stiffen the shell; check compatibility with the care label |
| Stitching | Tears on seams, baffles, or high-stress areas | Any size | Best, when done neatly | Requires matching thread and a fine needle; poor technique can pucker the shell |
A self-adhesive patch is the most popular home choice because it is fast and clean. Repair tape is fine for a tiny hole you want to stop from growing, but treat it as temporary. Fabric adhesive gives strong results on small tears if you let it cure for the full time on the label.
Watch out: a patch alone will not always hold. Adhesive fails when the fabric around the tear is oily, dusty, or worn thin, so clean and inspect the surrounding shell before you apply anything.
For Miami residents, humidity affects cure times. Adhesives and patch backing can take longer to set in a damp room, so plan to leave the jacket flat in an air-conditioned space with good airflow for the full cure time rather than hanging it in a closet.
Gather Materials and Prepare the Damaged Area
Good prep matters more than the repair itself. Gather your supplies before you start so you do not have to stop midway.
What you will need:
- A self-adhesive nylon patch, or repair tape, or fabric adhesive
- Sharp scissors
- A small piece of cardboard or a flat board
- Rubbing alcohol and a clean cloth
- A ruler or measuring tape
- Tweezers for loose down
Lay the jacket flat on a clean surface. Slide the cardboard inside the jacket behind the tear so the glue does not stick to the other side. Use a damp cloth with a little rubbing alcohol to clean the area around the hole. Let it dry fully before you apply anything. Oil from your skin or a laundry detergent residue can keep a patch from sticking.
Contain Loose Down and Push It Back Inside
Loose down can escape quickly, so deal with it first. Do not pull feathers out of the hole, because that can widen the tear.
Gently push the down back inside the jacket with your fingers. Work from the outside of the jacket toward the hole. If feathers keep escaping, press a small piece of tape over the hole as a temporary stopper while you prepare the patch.
What not to do when down is escaping:
- Do not stuff the hole with cotton or other fibers.
- Do not wash the jacket before the repair. Water can spread the down.
- Do not force a large clump back through the opening.
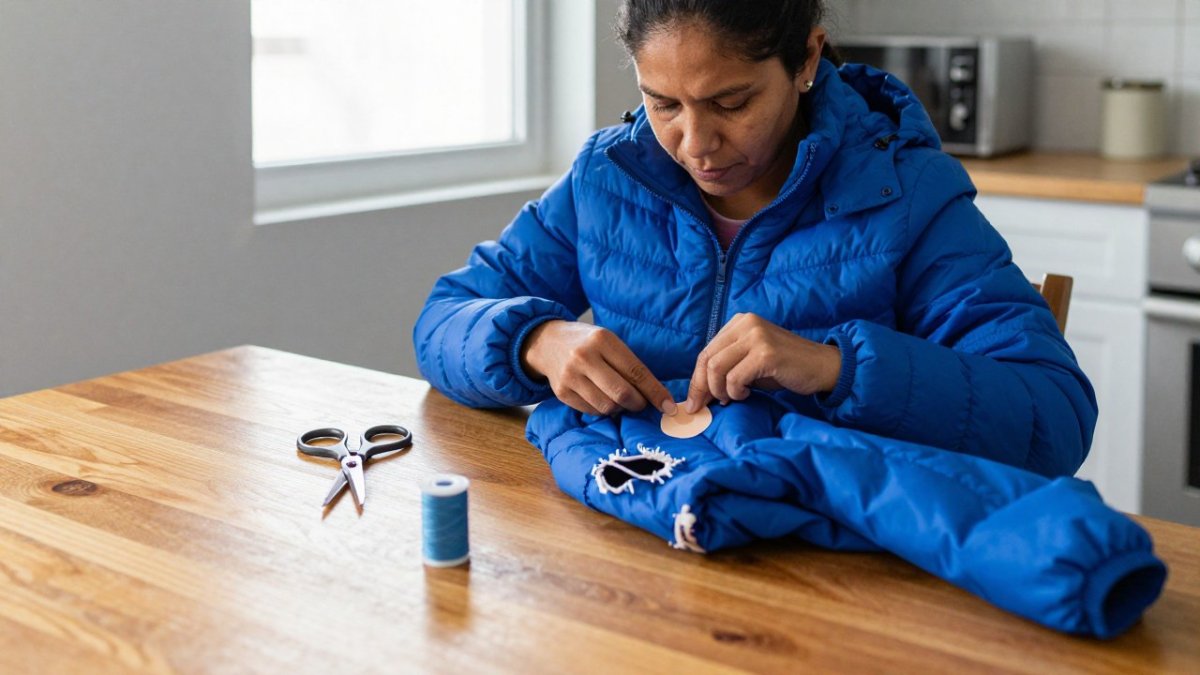
Apply a Down Jacket Repair Patch Step by Step
Once the area is clean and the down is contained, you are ready to apply the patch. Work slowly and keep the jacket flat.
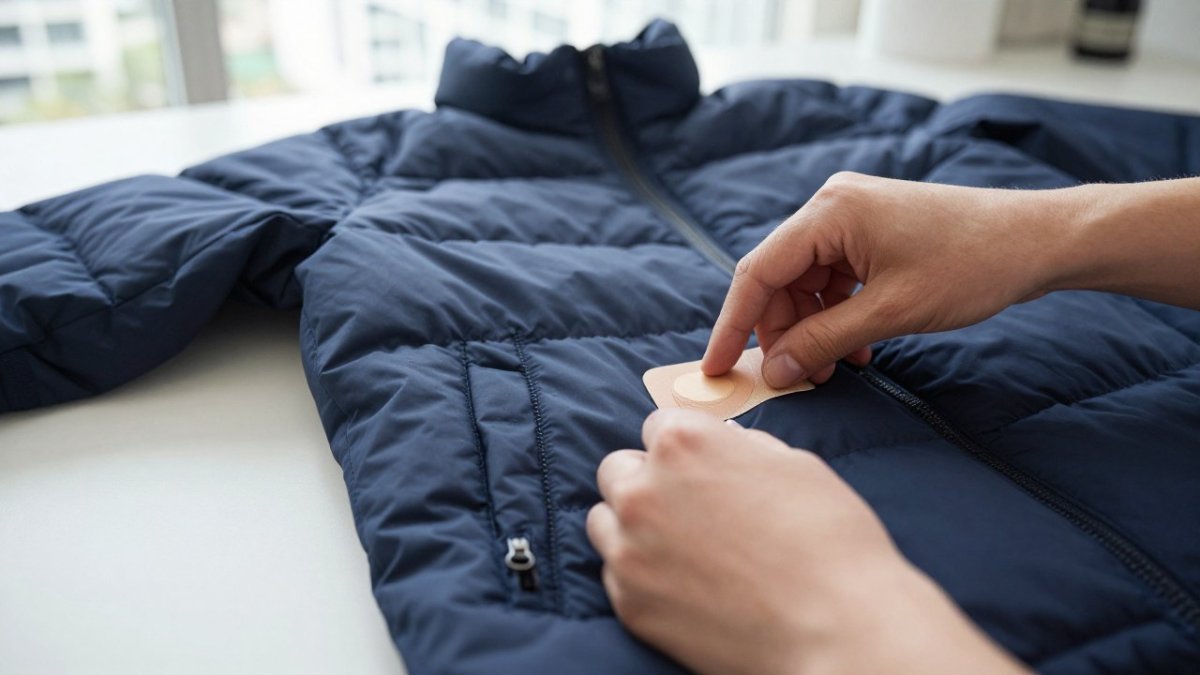
- Cut the patch. Use the cutting steps below to shape it.
- Peel the backing. Remove the protective layer without touching the sticky side.
- Center the patch. Place it over the tear so the hole is fully covered with an overlap of about half an inch on each side.
- Press firmly. Use the flat of your hand, then a credit card or similar tool, to press from the center outward.
- Smooth the edges. Run your finger around the border to remove air bubbles.
- Let it cure. Leave the jacket flat for 24 hours before you wear or wash it.
Expected result: The patch should lie flat and feel firmly attached. The surface should look smooth, with no lifting edges.
Cutting and Rounding the Patch
The shape of your patch affects how well it holds. Square corners tend to catch on fabric and lift over time. Rounded corners lie flatter and resist peeling.
- Cut the patch so it extends at least a half inch past every edge of the tear.
- Round all four corners with scissors, leaving a smooth curve about the size of a pencil eraser.
- For a round hole, cut a circle patch instead of a square.
Patch size matters. A patch that is too small will peel at the edges, even if the center holds. When in doubt, go a little larger.
Repairing Tears Near Seams, Baffles, and High-Stress Areas
Seams, baffles (the stitched chambers that hold down in place), zippers, and cuffs take more strain than flat panels, so a patch that works on the chest can fail here.
Tears next to a seam. Avoid placing a patch directly over the stitching. Stitch holes can let down escape even under a patch, and a patch that bridges a seam sits on an uneven surface that peels faster.
Tears on a baffle. Check that down has not shifted into neighboring chambers. Repairs near baffles are harder because the fabric is often doubled and the chamber is under tension.
Tears near a zipper or pocket. A bulky patch can catch on zipper teeth or block a pocket opening. Trim the patch so it stops at least a quarter inch short of the zipper tape, and test the zipper through several full cycles before you wear the jacket.
Tears on cuffs and hems. These edges rub against wrists, gloves, and pack straps, so tape will not last. Stitching or a sewn-on patch holds up better, and a reinforcing stitch line around the repair adds life.
Miami-specific care. In Miami's humid climate, adhesives can take longer to cure and stored jackets can pick up mustiness. Keep the jacket in a dry, air-conditioned room with good airflow while the repair sets, and avoid hanging it in a damp closet.
Watch out: do not pull on loose down near a seam or baffle to test the repair. Pulling widens the opening and can tear the baffle stitching, turning a small fix into a chamber repair.
Book Your Jacket Cleaning or Repair Pickup with LaundrPro
A small tear can be a simple weekend project, but some jackets need a professional. If the damage is large, the down loss is heavy, or the jacket is expensive, booking a service may save time and money.
LaundrPro offers door-to-door laundry and dry cleaning for busy households in Miami, with a focus on spotless results and premium product care. Pricing depends on quantity, dates, and delivery, so check our website for current rates or request a quote before you book. If you are still comparing options, see how to choose a laundry service in Miami.
Place your order online, and we will arrange door-to-door pickup and delivery. Before handing over your jacket, review our laundry service damage policy to see how we handle any issues.
Frequently Asked Questions
Can you repair a small tear in a down jacket without sewing?
Yes. For small tears, a self-adhesive fabric repair patch or fabric repair tape is usually enough. Clean the area, contain the loose down, cut a patch with rounded corners that overlaps the hole by about half an inch on each side, and press it firmly so the adhesive bonds. Allow the adhesive to cure fully before wearing the jacket or washing it. Larger tears or tears on high-stress areas like seams and baffles may still need professional stitching.
Can you use duct tape to fix a tear in a down jacket?
Duct tape is not recommended. It is stiff, tends to peel off, and leaves residue that can stain the shell fabric and stick to down clusters. A fabric-specific repair tape or adhesive patch designed for outdoor shell materials holds better and stays flexible through wear and washing. If you only have duct tape for an emergency, use it as a temporary fix and replace it with a proper patch.
What kind of patch works best for a down jacket?
Choose a self-adhesive patch or repair tape made for nylon or polyester shell fabric, since most down jackets use these materials. Look for a product that is labeled as water-resistant and wash-durable. Avoid cheap iron-on patches on lightweight shells, as heat can damage some coatings. Match the patch color to your jacket where possible, or pick a neutral tone for a less visible repair.
When should a down jacket tear be repaired by a professional?
Consider professional repair if the tear is larger than a few inches, sits on a seam or baffle where stitching has failed, or is near a zipper that is also damaged. A professional can restitch the seam and reinsert down in a way that home patches cannot match. If the jacket is valuable or you want to keep its warmth consistent, a repair shop or a dry cleaning and repair service in Miami can assess it and quote the work.